Introduction to the Vim Editor
In the world of Linux Administration and software development, the command line is king, and within that kingdom, the Vim editor reigns supreme. For the uninitiated, Vim (Vi IMproved) can seem like an arcane and unforgiving tool. It lacks the familiar menus and mouse-driven interface of modern IDEs, and its infamous “how do I exit?” problem has become a rite of passage for many newcomers. However, beneath this steep learning curve lies a text editor of unparalleled power, speed, and efficiency. Once mastered, Vim transforms from a simple text editor into a fluid extension of a developer’s thoughts, enabling code and configuration manipulation at the speed of thought.
Vim is pre-installed on virtually every UNIX-like system, from massive Linux Server deployments on AWS to the tiniest embedded device. This ubiquity makes it an indispensable tool for any System Administration professional. For developers, its deep customizability, powerful features for text manipulation, and integration with countless Linux Tools make it a formidable environment for everything from Python Scripting to low-level C Programming Linux. This article will guide you from the fundamental philosophy of Vim to advanced techniques, helping you unlock its full potential and integrate it into your modern Linux DevOps workflow.
Section 1: The Vim Philosophy – Understanding Modal Editing
The single most important concept to grasp in Vim is its modal nature. Unlike most editors where typing immediately inserts characters, Vim operates in several distinct modes. This design choice is deliberate: it separates the act of writing text from the act of manipulating it, allowing for powerful command combinations using the entire keyboard without awkward modifier keys like Ctrl or Alt. Understanding these modes is the first and most crucial step to proficiency.
Normal Mode: The Command Center
When you first open Vim, you are in Normal mode. This is your command center, the mode where you’ll spend most of your time. In Normal mode, every key on the keyboard has a function for navigation or manipulation. You don’t insert text here; you command the editor. Think of it as speaking a language of text editing.
- Navigation: Use
h(left),j(down),k(up), andl(right) to move the cursor. This keeps your hands on the home row. Other useful movements includew(next word),b(previous word),0(start of line), and$(end of line). - Manipulation: Commands are composable. For example,
dis the delete operator. When you combine it with a motion, you perform a targeted deletion.dwdeletes a word,d$deletes to the end of the line, anddddeletes the entire line. Similarly,yis for “yanking” (copying) andpis for “pasting”.
Insert Mode: The Familiar Territory
This is the mode that behaves like a traditional text editor. You enter Insert mode from Normal mode using one of several commands:
i: insert text before the cursor.a: append text after the cursor.o: open a new line below the current line and enter Insert mode.O: open a new line above the current line and enter Insert mode.
Once you are finished typing, you press the Esc key to return to Normal mode. This constant switching between modes becomes second nature and is the core of the Vim workflow.
Visual Mode: The Precision Tool
Visual mode is used for selecting text. Once a block of text is selected, you can run any Normal mode command on it. This is incredibly useful for applying changes to specific, irregular blocks of code or text.
v: enter character-wise Visual mode.V: enter line-wise Visual mode.Ctrl-v: enter block-wise Visual mode, allowing you to select rectangular columns of text.
For example, to delete a specific paragraph, you could enter Visual mode with v, move the cursor to select the paragraph, and then press d.
Section 2: Configuration and Customization – Making Vim Your Own
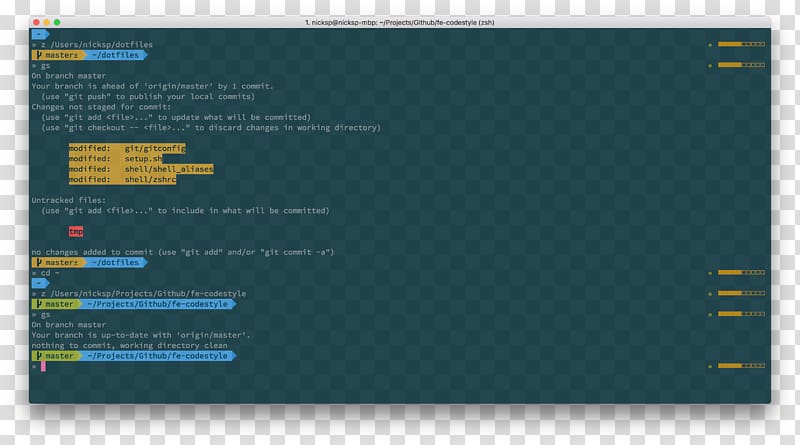
Vim code editor screenshot – Computer program Vim Integrated development environment TypeScript …
A default Vim installation is powerful but spartan. The true potential is unlocked through customization. This is primarily done through a single configuration file and an expansive ecosystem of plugins. Whether you’re editing an Nginx configuration, a Python Automation script, or an Ansible playbook, a well-configured Vim can provide syntax highlighting, linting, and smart indentation.
The `.vimrc` File: Your Personal Settings
Vim’s configuration is controlled by a file in your home directory named .vimrc. This file is written in Vimscript, a simple scripting language. Here, you can set options, map keys, and define custom functions to tailor the editor to your exact needs. A good starting `.vimrc` can dramatically improve the user experience.
Here is a practical, well-commented example of a basic .vimrc file to get you started. You can place this in ~/.vimrc.
" A sensible .vimrc configuration for modern development

" Enable syntax highlighting
syntax on

" Use filetype-specific indentation and plugins
filetype plugin indent on

" Set the number of spaces for a tab
set tabstop=4
set softtabstop=4
set shiftwidth=4
set expandtab " Use spaces instead of tabs

" Show line numbers
set number

" Show relative line numbers (useful for vertical navigation)
set relativenumber

" Highlight the current line
set cursorline

" Enable searching that is not case-sensitive,
" but becomes case-sensitive if you use any uppercase letters
set ignorecase
set smartcase

" Highlight search results
set hlsearch
set incsearch " Show matches as you type

" Enable a persistent undo history
set undofile
set undodir=~/.vim/undodir

" Set a color scheme (ensure it's installed)
" colorscheme gruvbox
Extending Vim with Plugins
While the .vimrc is great for settings, plugins add entirely new features. Modern Vim (version 8 and above) has a native package management system, but many users still prefer a dedicated plugin manager for its simplicity. A popular choice is vim-plug.
To use it, you add a section to your .vimrc that lists the plugins you want from GitHub or other sources. Then you run a command in Vim to install or update them. This makes managing your tools for Linux Development straightforward.
Here’s how you would declare a few essential plugins using vim-plug in your .vimrc:
" vim-plug plugin management section
call plug#begin('~/.vim/plugged')

" A file explorer tree
Plug 'preservim/nerdtree'

" A fuzzy file finder
Plug 'junegunn/fzf', { 'do': { -> fzf#install() } }
Plug 'junegunn/fzf.vim'

" A status line enhancer
Plug 'vim-airline/vim-airline'
Plug 'vim-airline/vim-airline-themes'

" A popular, legible colorscheme
Plug 'morhetz/gruvbox'

" Git integration
Plug 'tpope/vim-fugitive'

" Auto-completion engine (requires further setup)
Plug 'neoclide/coc.nvim', {'branch': 'release'}

call plug#end()

" --- Your other settings go here ---
" e.g., colorscheme gruvbox
After adding this, you would open Vim and run :PlugInstall to download and install these plugins.
Section 3: Advanced Vim Techniques for Power Users
Once you are comfortable with modal editing and have a basic configuration, you can explore the features that make Vim a productivity powerhouse for Linux DevOps and System Programming.
Macros: Automating Repetitive Tasks
Macros are one of Vim’s most powerful features. They allow you to record a sequence of keystrokes and play them back, automating complex, repetitive edits. This is far more efficient than manual editing or even multi-cursor features in other editors.
To record a macro:
- Press
qfollowed by a letter (e.g.,a) to start recording into registera. - Perform your sequence of edits. Make sure your movements are repeatable (e.g., use
^to go to the start of the line instead of justh). - Press
qagain to stop recording. - To execute the macro, press
@followed by the register letter (e.g.,@a). To repeat the last macro, use@@.
Imagine you have a Python script and you need to change a series of dictionary lookups from data["key"] to data.get("key") to make them safer.

# Original Python code
user = response_data["user"]
profile = response_data["profile"]
settings = response_data["settings"]
permissions = response_data["permissions"]
You could place your cursor on the first line and record a macro: qa^f"diw.get("^[A")^[q. Then, you can simply go to the next line and press @a to repeat the transformation.
The Power of Search and Replace
Vim’s search and replace functionality is built on regular expressions, making it incredibly powerful for refactoring code or processing text files. The command is :s (substitute).
The basic syntax is :[range]s/{pattern}/{replacement}/[flags].
range: The lines to operate on.%means the entire file.pattern: The text or regex to find.replacement: The text to replace it with.flags: Common flags areg(global, replace all occurrences on a line) andc(confirm each replacement).
For example, in a Bash Scripting project, you might want to rename a legacy variable MASTER_NODE to PRIMARY_NODE across all files. You could run: :%s/MASTER_NODE/PRIMARY_NODE/g.
#!/bin/bash

# A script for managing cluster nodes
# Let's refactor the variable names for clarity

MASTER_NODE="10.0.1.10"
echo "Pinging the master node: $MASTER_NODE"

if check_status $MASTER_NODE; then
    echo "$MASTER_NODE is online."
else
    echo "Could not reach $MASTER_NODE."
fi
Running :%s/MASTER_NODE/PRIMARY_NODE/g on the script above would instantly and correctly update all instances.
Integrating with the Shell
Vim is a citizen of the Linux Terminal, and it integrates seamlessly with the shell and other command-line utilities. This is a game-changer for System Administration.
:!{cmd}: Execute any shell command. For example,:!ls -lrunsls -land displays the output.:r !{cmd}: Read the output of a command directly into your buffer. For example,:r !datewill insert the current date and time.!{motion}{cmd}: Filter a section of your text through an external command. For instance, select a block of unsorted lines in Visual mode and type:!sortto sort them.
Section 4: Best Practices and Ecosystem Integration
To truly master Vim, it’s important to integrate it into your wider workflow and adopt practices that enhance productivity without creating unnecessary complexity.
Vim in a Modern Workflow
Vim shines when combined with other terminal tools. A common and powerful combination is Vim with Tmux, a terminal multiplexer. This allows you to have multiple shell panes alongside your Vim session, creating a complete, keyboard-driven development environment. You can edit your Docker Tutorial Dockerfile in one pane, run `docker build` in another, and monitor logs in a third, all without leaving the terminal.
Furthermore, modern Vim can be a first-class IDE. With plugins like `coc.nvim`, you can integrate the Language Server Protocol (LSP) for features like intelligent auto-completion, go-to-definition, and inline error diagnostics for dozens of languages, from Python to Go.
Common Pitfalls to Avoid
- Plugin Hoarding: It’s tempting to install dozens of plugins at once. This can slow Vim down and create conflicting keymaps. Start with a minimal set and add plugins only when you identify a specific, recurring pain point they can solve.
- Ignoring the Basics: Don’t rely on plugins to replicate features from other editors. Learn Vim’s native way of doing things first. Master motions, text objects, and macros before reaching for a plugin.
- Forgetting `:help`: Vim has some of the best built-in documentation of any software. If you’re unsure about a command or concept, just type
:help {topic}(e.g.,:help motions).
Conclusion: Your Journey with Vim
Vim is not just a text editor; it’s a skill you invest in. The initial learning curve is undeniable, but the payoff in long-term productivity and efficiency is immense. By embracing its core philosophy of modal editing, you gain a powerful language for text manipulation. Through careful customization of your .vimrc and a curated set of plugins, you can craft an editing environment perfectly suited to your tasks, whether that’s managing a Linux Server, developing cloud-native applications with Kubernetes Linux, or performing Python System Admin tasks.
Start your journey by running vimtutor, a fantastic interactive tutorial included with Vim. Be patient, practice the fundamentals, and gradually build up your configuration. In time, you will find that Vim becomes an indispensable part of your toolkit, enabling you to work more effectively and with greater focus in the Linux Terminal.


