For many system administrators and DevOps engineers, the three letters S-E-L are a source of anxiety. Security-Enhanced Linux, or SELinux, has a reputation for being complex, cryptic, and the first thing to get disabled when an application mysteriously fails. However, this powerful security module, a core feature in distributions like Red Hat Linux, CentOS, and Fedora, is one of the most robust tools in your Linux security arsenal. It enforces a strict Mandatory Access Control (MAC) policy, moving beyond the traditional Discretionary Access Control (DAC) model of users and file permissions.
Instead of asking “Can this user access this file?”, SELinux asks “Is this process, in its current context, allowed to perform this action on this object, in its context?”. This granular control can prevent even a compromised root process from damaging the system. This article will demystify SELinux, transforming it from a perceived obstacle into a practical, manageable, and indispensable part of your Linux administration and DevOps toolkit. We’ll move from core concepts to real-world troubleshooting, using practical examples you can apply directly on your Linux server.
Understanding the Core Concepts of SELinux
Before you can effectively manage SELinux, you need to grasp its fundamental components: modes, contexts, and booleans. These three pillars form the basis of all SELinux operations and are essential for any Linux administrator.
SELinux Modes: Enforcing, Permissive, and Disabled
SELinux operates in one of three modes, which dictates its behavior:
- Enforcing: This is the default and fully active mode. SELinux actively blocks any actions that violate its policy and logs the denial.
- Permissive: In this mode, SELinux does not block any actions. Instead, it logs any actions that would have been denied if it were in enforcing mode. This is an invaluable troubleshooting tool, allowing you to see what’s being blocked without breaking functionality.
- Disabled: SELinux is completely turned off. A reboot is required to switch to or from this mode. Disabling SELinux is strongly discouraged in production environments.
You can check and change the current mode using simple Linux commands. Temporary changes are useful for on-the-fly debugging, while permanent changes require editing a configuration file.
# Check the current SELinux mode
getenforce

# Temporarily switch to Permissive mode (reverts on reboot)
# 0 = Permissive, 1 = Enforcing
sudo setenforce 0

# To make the change permanent, edit the configuration file
# sudo vim /etc/selinux/config
#
# Change the line:
# SELINUX=enforcing
# to:
# SELINUX=permissive
#
# A reboot is required for this change to take effect.
The Anatomy of an SELinux Context
The heart of SELinux is the security context, or “label.” Every single process and object (file, directory, network port, etc.) on the system has an SELinux context. A policy rule must explicitly allow an action between a source context (like a process) and a target context (like a file). The context has a `user:role:type:level` structure, but for most system administration tasks, you’ll primarily interact with the type context. For example, the Apache web server process runs with the `httpd_t` type, and it needs to access files with the `httpd_sys_content_t` type.
# View the SELinux context of files and directories in /var/www
# The -Z flag shows the context
ls -Z /var/www

# Example Output:
# drwxr-xr-x. root root system_u:object_r:httpd_sys_content_t:s0 cgi-bin
# drwxr-xr-x. root root system_u:object_r:httpd_sys_content_t:s0 html

# View the SELinux context of running processes
# We'll grep for the Apache (httpd) process
ps auxZ | grep httpd

# Example Output:
# system_u:system_r:httpd_t:s0    root      1234  0.0  0.1 227524 11468 ?        Ss   10:00   0:01 /usr/sbin/httpd -DFOREGROUND
SELinux Booleans
SELinux policies are not entirely rigid. Booleans are on/off switches that allow you to change parts of the policy at runtime without needing to write custom policy code. They are designed to permit common, but not default, application behaviors. For instance, a boolean might allow Apache to connect to a remote database or allow users’ home directories to be served via FTP.


You can list all available booleans with `getsebool -a` and change a specific one with `setsebool`. The `-P` flag makes the change permanent across reboots.
# List all httpd-related booleans
getsebool -a | grep httpd

# Example: Allow Apache to connect to the network (often needed for remote databases)
# This is off by default.
# To turn it on permanently:
sudo setsebool -P httpd_can_network_connect 1

# Verify the change
getsebool httpd_can_network_connect
Practical SELinux Administration and Troubleshooting
Theory is important, but SELinux is best understood through practice. Most administrators first encounter SELinux when a perfectly configured service fails to start or work as expected. Let’s walk through the most common scenarios and their solutions.
The Classic Scenario: Running Apache on a Non-Standard Port
Imagine you need to run an Apache web server on port 8083. You’ve configured Apache’s `httpd.conf`, opened the port in the Linux firewall (`firewalld`), but the service won’t start or is inaccessible. This is a classic SELinux issue. The default SELinux policy only allows the `httpd_t` process to bind to ports with the `http_port_t` type, which includes ports 80, 443, 8008, etc., but not 8083.
Your first step should be to check the audit log, typically located at `/var/log/audit/audit.log`. This log contains detailed records of all SELinux denials. You’ll likely see an `AVC` (Access Vector Cache) denial message indicating that the `httpd` process was denied permission to `name_bind` on port 8083.
Managing Port Contexts with `semanage`
The correct way to solve this is not to disable SELinux, but to tell SELinux that port 8083 is a valid port for Apache. We do this using the `semanage` command, a powerful tool for managing SELinux policy configurations. You may need to install it first (`sudo dnf install policycoreutils-python-utils` on RHEL/CentOS).
# First, check which ports Apache is currently allowed to use
sudo semanage port -l | grep http_port_t

# Example Output:
# http_port_t                    tcp      80, 81, 443, 488, 8008, 8009, 8443, 9000
# ... (other related ports)

# Now, add port 8083 to the list of allowed http_port_t types
# -a: add a record
# -t: specify the type (http_port_t)
# -p: specify the protocol (tcp)
sudo semanage port -a -t http_port_t -p tcp 8083

# Verify that the port has been added
sudo semanage port -l | grep http_port_t

# Now, restart Apache, and it should bind to the port successfully
sudo systemctl restart httpd
Correcting File Contexts with `chcon` and `restorecon`
Another common issue arises from moving files. Let’s say you download a website’s `index.html` to your home directory (`/home/user`) and then move it to the webroot (`/var/www/html`). The file retains its original SELinux context, `user_home_t`, which the Apache process (`httpd_t`) is not allowed to read. This results in a “403 Forbidden” error, even if file permissions are correct.
The `restorecon` command is the solution. It reads the system’s default file context rules and “restores” the correct context to files and directories. While `chcon` can change a context manually, it’s a temporary fix that won’t survive a system relabel; `restorecon` applies the permanent, policy-defined context.
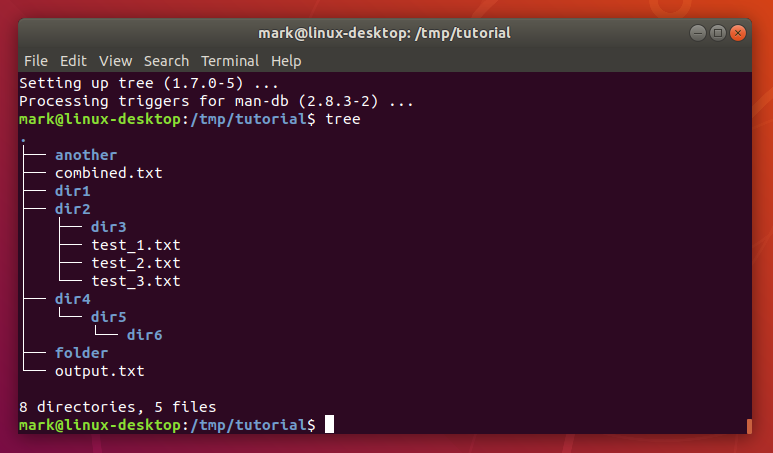


# 1. Create a test file in the home directory
echo "Test Page" > ~/test.html

# 2. Check its context (it will be user_home_t)
ls -Z ~/test.html

# 3. Move it to the Apache web root
sudo mv ~/test.html /var/www/html/

# 4. Check its context again in the new location. It's still user_home_t!
# This is why Apache can't read it.
ls -Z /var/www/html/test.html

# 5. Use restorecon to fix the context based on the parent directory's policy
# -v: verbose (shows what it's doing)
# -R: recursive (acts on the directory and everything inside it)
sudo restorecon -vR /var/www/html

# 6. Check the context one last time. It's now httpd_sys_content_t.
ls -Z /var/www/html/test.html
Advanced SELinux Policy Management
Sometimes, a pre-defined boolean or context isn’t enough. For custom applications or complex configurations, you may need to interpret audit logs and even create your own local policy modules. This is where tools like `sealert` and `audit2allow` become essential.
Troubleshooting with `sealert`
The raw audit log can be difficult to read. The `setools-console` package provides the `sealert` utility, which analyzes the audit log, identifies SELinux denials, and provides clear, human-readable explanations and suggested solutions. This should always be your first step when facing a complex denial.
Running `sealert -a /var/log/audit/audit.log` will present a report of denials, often with the exact `setsebool` or `semanage` command needed to fix the issue.
Generating Custom Policy Modules with `audit2allow`
When no existing boolean or context type can permit a required action, you can generate a custom SELinux policy module. The `audit2allow` tool does this by reading denial messages from the audit log and creating the necessary rules.
Let’s imagine a custom application (`myapp_t`) needs to access a specific directory (`/data/myapp_data_t`) in a way not covered by the base policy. After running the app and seeing denials, you would follow this workflow:
# 1. First, ensure you have the necessary tools
sudo dnf install policycoreutils-python-utils setools-console

# 2. Grab the relevant AVC denials from the audit log for your application
sudo grep "denied" /var/log/audit/audit.log | grep "myapp_t" > myapp_denials.txt

# 3. Use audit2allow to create a local policy module
# -M: create a module with the given name (e.g., myapplocal)
cat myapp_denials.txt | audit2allow -M myapplocal

# This command creates two files:
# myapplocal.te: A human-readable Type Enforcement file with the new rules.
# myapplocal.pp: A compiled Policy Package file.

# 4. Inspect the .te file to ensure the rules are reasonable and not overly permissive.
# cat myapplocal.te

# 5. If the rules look correct, install the compiled module.
sudo semodule -i myapplocal.pp

# The new policy is now active. You can manage it with `semodule -l`.
Best Practices and Common Pitfalls
Effectively managing SELinux involves adopting a security-first mindset and avoiding common mistakes that can undermine its protections.
Best Practices for SELinux Administration
- Never Disable SELinux in Production: If you’re troubleshooting, switch to Permissive mode. This logs denials without enforcing them, allowing you to gather the information needed to fix the policy without compromising security long-term.
- Prefer Built-in Solutions: Always try to solve a problem with `setsebool` or `semanage` before resorting to `audit2allow`. Built-in solutions are tested, supported, and maintained by the policy creators.
- Use `restorecon` for Permanence: When fixing file contexts, `restorecon` is almost always the right choice over the temporary `chcon`.
- Audit and Update: Regularly check your audit logs for unexpected denials. Keep your system, especially the `selinux-policy-*` packages, up to date to receive the latest policy rules for new software versions.
- Automate with Ansible/Puppet: For Linux DevOps environments, integrate SELinux management into your automation. Tools like Ansible have dedicated modules for managing booleans, file contexts, and port labels, ensuring consistent configuration across your infrastructure.
Common Pitfalls to Avoid
- Confusing SELinux with the Firewall: Opening a port in `firewalld` or `iptables` does not automatically grant SELinux permission. They are separate security layers, and both must permit the traffic.
- Creating Overly Permissive Policies: When using `audit2allow`, it’s easy to blindly trust its output. Always inspect the generated `.te` file to understand what you’re allowing. A poorly written custom policy can create a security hole.
- Forgetting Contexts on File Restores: When restoring files from a backup, ensure your backup tool preserves SELinux contexts or run `restorecon` on the restored data to prevent access issues.
Conclusion
SELinux is not an arbitrary hurdle; it is a sophisticated, fine-grained security system that provides a critical layer of defense for modern Linux servers. By moving beyond the fear of the unknown and embracing its core concepts, you can transform it into a powerful ally. Understanding modes, contexts, and booleans allows you to solve the vast majority of common issues. For the rest, a methodical approach using tools like `semanage`, `restorecon`, and `audit2allow` provides a clear path to resolution.
The next time a service misbehaves on a Red Hat or CentOS system, don’t reach for `setenforce 0` as a permanent solution. Instead, check the audit log. Treat it as an opportunity to strengthen your system’s security posture and deepen your skills as a Linux professional. By mastering SELinux, you are not just fixing a problem; you are building a more resilient and secure infrastructure.

